Both MP3 and WAV are two of the most common audio file formats in the world of digital audio. While MP3 is still the most popular audio file format, the file format can be compressed to a manageable size for storage, which can lead to quality loss.
To avoid quality loss and have the highest quality audio, users need to look for ways to download the audio files in WAV format. WAV is basically a lossless audio format that doesn’t compress the original file.
So, if you want to experience the highest quality audio, you need to get the audio files in WAV file format. Due to the immense benefits of the WAV file format, users often search for ways to convert their existing music videos to WAV format.
1. 4KDownload
4KDownload is a top-rated online YouTube to WAV downloader you can use today. The site is absolutely free to use & it doesn’t limit you in converting the videos to WAV file format.
With 4KDownload, you can download unlimited videos for free; there’s no requirement for registration. Just paste the video link, set WAV as the output format, and you are good to go.
YTConverter is an online YouTube to WAV converter that lets you save your favorite music videos in high quality WAV format.
The functionality of YTConverter remains very similar to the 4KDownload site that has been listed just above.
To get started with this site, paste the YouTube video link you want to convert, select WAV as output, and click on the Start button.
Downloaderto is a great site for converting videos from YouTube to WAV format. Users mainly use this site to extract audio from a YouTube video in high quality.
What we like most about Downloaderto is that it works with YouTube and other social networking sites like Twitter, Facebook, TikTok, etc.
However, before you convert the videos, you need to download them. So, to download your favorite videos from YouTube, you need to use free online video downloaders.
Once you download the music videos, you can use video converter softwares to convert the videos into WAV file format. Here are some of the best video converters for PC.
Or else, you can check out this list – YTMP3 Alternatives. On that list, we mentioned sites that convert YouTube videos to MP3, but some sites also support WAV as an output format.
1. Make sure you have downloaded the music video on your computer.
2. Launch VLC Media Player. Next, choose Media > Convert / Save.
3. Next, click Add and pick the video file you want to convert.
4. Next, click on the Convert / Save drop-down and select Convert.
5. Now click on the Create a new profile button beside Profile.
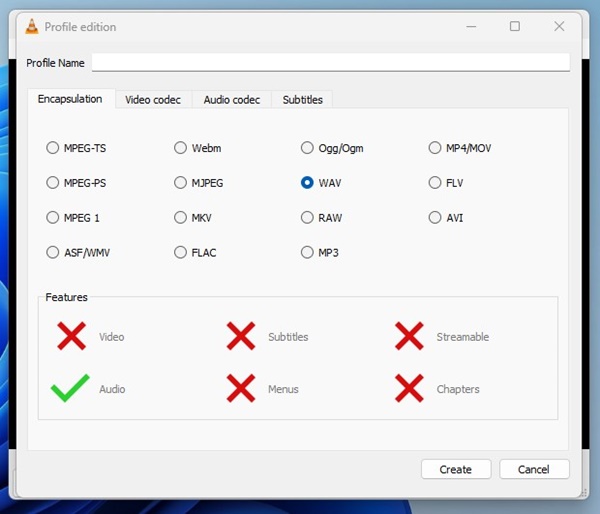
6. On the Encapsulation, select WAV. Next, switch to the Audio Codec.

7. Enable the Audio checkbox and click on the Codec drop-down. On the drop-down, select WAV.
8. On the sample rate drop-down menu, select 48000 Hz. Once done, click on the Create button.
9. Select your new profile on the Profile drop-down menu, set the destination location, and click Start.
That’s it! This is how you can use VLC Media Player to convert your MP3 files to WAV format.
To avoid quality loss and have the highest quality audio, users need to look for ways to download the audio files in WAV format. WAV is basically a lossless audio format that doesn’t compress the original file.
So, if you want to experience the highest quality audio, you need to get the audio files in WAV file format. Due to the immense benefits of the WAV file format, users often search for ways to convert their existing music videos to WAV format.
How to Convert YouTube Videos to WAV
In this way, you can enjoy the lossless WAV audio files offline. If you have some YouTube music videos whose audio files you want to extract, it’s recommended to convert YouTube videos into WAV format. This way, you will get only the high quality audio of your favorite music video. Here are the best ways to convert YouTube to WAV.1) Use Online Converter to Convert YouTube to WAV
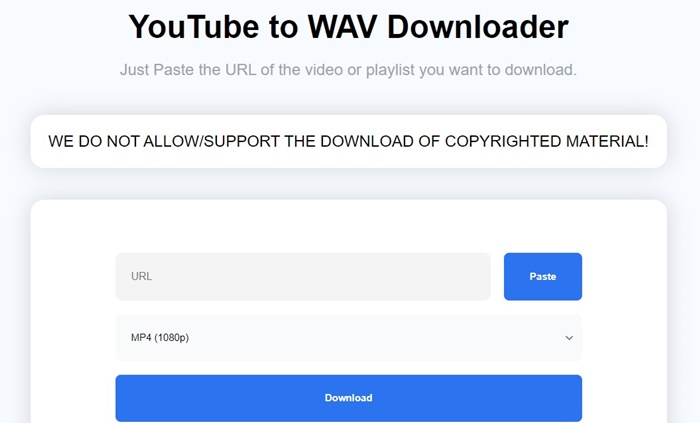
The most easiest way to convert YouTube videos to WAV file format is to use an online converter. Currently, hundreds of online YouTube videos to WAV converters are available on the web; you can use any of them. Below, we have mentioned some of the best online converters to convert YouTube videos to WAV.1. 4KDownload
4KDownload is a top-rated online YouTube to WAV downloader you can use today. The site is absolutely free to use & it doesn’t limit you in converting the videos to WAV file format.
With 4KDownload, you can download unlimited videos for free; there’s no requirement for registration. Just paste the video link, set WAV as the output format, and you are good to go.
2. YTConverter
The functionality of YTConverter remains very similar to the 4KDownload site that has been listed just above.
To get started with this site, paste the YouTube video link you want to convert, select WAV as output, and click on the Start button.
3. Downloaderto
What we like most about Downloaderto is that it works with YouTube and other social networking sites like Twitter, Facebook, TikTok, etc.
2) Convert using Video Converter Software
Like online video converters, video converters for PC exist. You can use video converter softwares on your PC to convert YouTube videos into WAV file format.However, before you convert the videos, you need to download them. So, to download your favorite videos from YouTube, you need to use free online video downloaders.
Once you download the music videos, you can use video converter softwares to convert the videos into WAV file format. Here are some of the best video converters for PC.
Or else, you can check out this list – YTMP3 Alternatives. On that list, we mentioned sites that convert YouTube videos to MP3, but some sites also support WAV as an output format.
Convert YouTube to WAV using VLC Media Player
VLC Media Player is a very common media player software available for Windows PCs. While it’s a media player app, it can easily convert your favorite YouTube videos to WAV format. Here’s how to convert YouTube videos to WAV file format in easy steps.1. Make sure you have downloaded the music video on your computer.
2. Launch VLC Media Player. Next, choose Media > Convert / Save.
3. Next, click Add and pick the video file you want to convert.
4. Next, click on the Convert / Save drop-down and select Convert.
5. Now click on the Create a new profile button beside Profile.
6. On the Encapsulation, select WAV. Next, switch to the Audio Codec.

7. Enable the Audio checkbox and click on the Codec drop-down. On the drop-down, select WAV.
8. On the sample rate drop-down menu, select 48000 Hz. Once done, click on the Create button.
9. Select your new profile on the Profile drop-down menu, set the destination location, and click Start.
That’s it! This is how you can use VLC Media Player to convert your MP3 files to WAV format.

