Nowadays, most of us root our android device as soon we purchase it because it is trend today. However, there are very less options available to unroot your devices. Therefore, we are going to mention two easy methods that will help you unroot your rooted android device easily. Go through the post to know about it.
These days Android Rooting is one of the most common things that you do after you purchase a smartphone or a tablet. It is easier than ever, it has lots of advantages and it helps you to gain full control over the device. But if you want to unroot your device due to slower speed because it might have lots of bugs or worse, the Android OS refuses to do its job. Another reason to unroot is the security issues which is one of the biggest concerns.
We recommended you to use these two apps called KingoRoot and SuperSU to unroot your device easily, and the best thing about these apps is that they are absolutely free to download.
As I said before, to unroot your android phone you can use any of the apps mentioned below
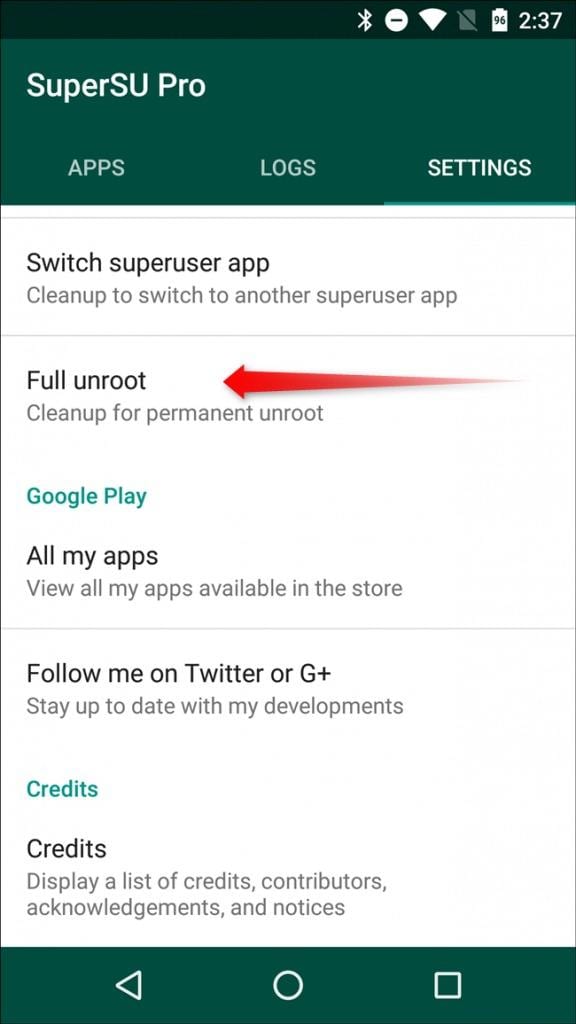
Step 2. Now you need to go to setting tab in SuperSU app and scroll down and you can see “Cleanup” section now where you need to tap on “Full Unroot” option.
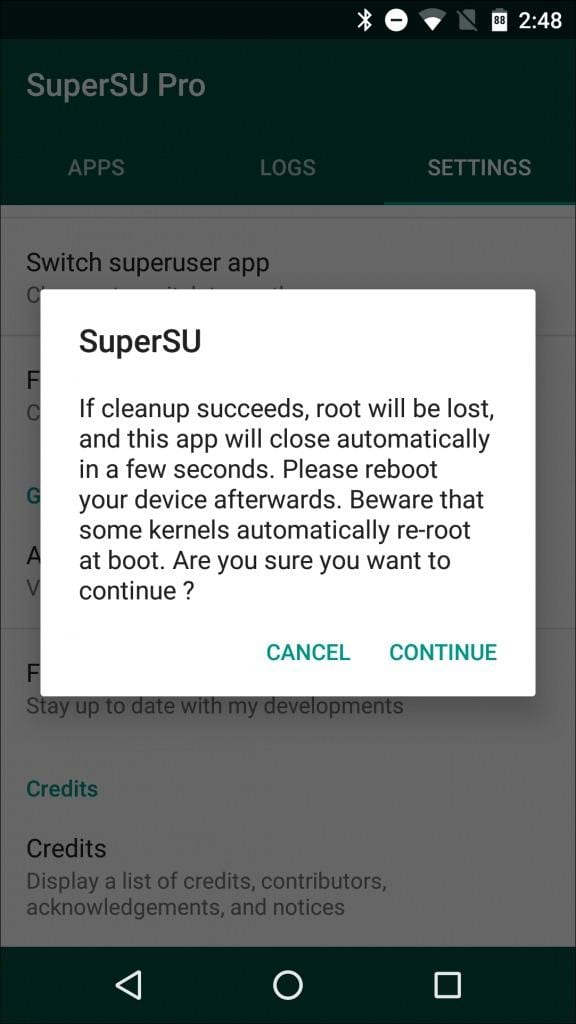
Step 3. On the very next step, you can see a Confirmation dialog box. You need to click on “Continue”
That’s it! you have successfully unrooted your device, and after that, you just need to restart your device in order to finish the process.
2 Using KingoRoot
The remove-root function is built in KingoRoot Android (PC version), which is a considerable decision made my Kingo R&D team while programming the software. It offers users a choice to revert back to unroot status by one click, fast and simple.
Step 1. First of all, Download and install the KingoRoot Android (PC version) and launch it on your computer. Now connect your device via USB cable. (USB Debugging mode must be enabled on your Android device)
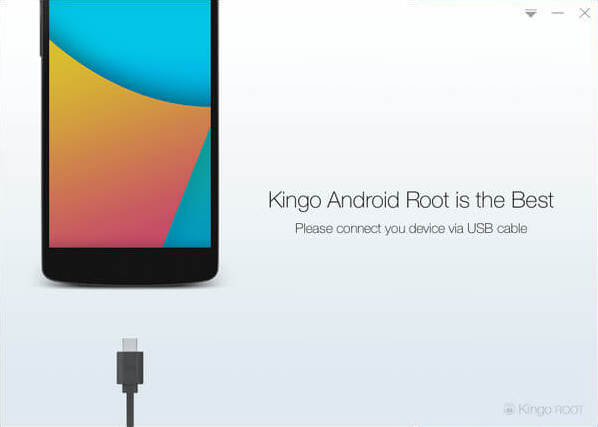
Step 2. Now KingoRoot will detect your Android device, and you will see two options “Remove Root” and “Root Again”
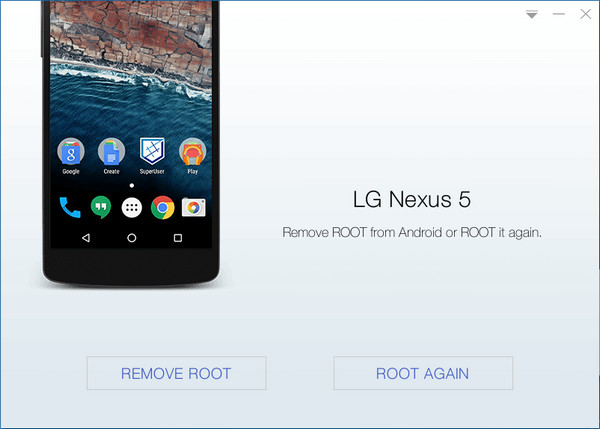
Step 3. Now you need to select the option “Remove Root”, now you have to wait for few minutes until KingoRoot Unroot your device.

Unroot Any Android Device In Single Click
That’s it! You are done, Kingoroot had successfully unrooted your android device.
3 Using ES File Explorer
Well, ES File Explorer is one of the best file managers to have on your Android smartphone. You can also use this awesome file manager app to unroot your rooted Android smartphone. Below we are going to give you some simple steps which you can follow to unroot your Android device easily using Es File Explorer
Step 1. First of all, you need to download and install ES File Explorer app from Google Play Store on your rooted device.
Step 2. Now launch the app and then tap on the menu button
Step 3. Under the Menu button, you need to scroll down to ‘Tools’ and then turn on ‘Root Explorer’
Step 4. This will ask you to grant the root privileges. Simply grant the permission and then on the main screen of the app you need to find your device’s root folder. You can find this as ‘/’ in explorer.
Step 5. From the root folder, you need to find and locate to ‘System’ | ‘Bin’
Step 6. Now there you need to find the ‘busybox’ and ‘su’ files and delete them.
Step 7. Now you need to navigate back to ‘/’ and open the ‘app’ folder. From there, delete superuser.apk
That’s it, you are done! Now you just need to restart your Android device and your device should reboot unrooted.
So these are the two apps to Unroot your Android device in 2018. With the help of these two apps, you can unroot your Android without any difficulty. Do try any of the apps and let us know which one worked on your device. Share this post with your friends too! and leave a comment below you are facing any problem concerning the above methods
These days Android Rooting is one of the most common things that you do after you purchase a smartphone or a tablet. It is easier than ever, it has lots of advantages and it helps you to gain full control over the device. But if you want to unroot your device due to slower speed because it might have lots of bugs or worse, the Android OS refuses to do its job. Another reason to unroot is the security issues which is one of the biggest concerns.
We recommended you to use these two apps called KingoRoot and SuperSU to unroot your device easily, and the best thing about these apps is that they are absolutely free to download.
As I said before, to unroot your android phone you can use any of the apps mentioned below
1 Using SuperSU App
SuperSU allows for advanced management of Superuser access rights for all the apps on your device that needs root. This app also includes the option of “Full Unroot” which we will be using.
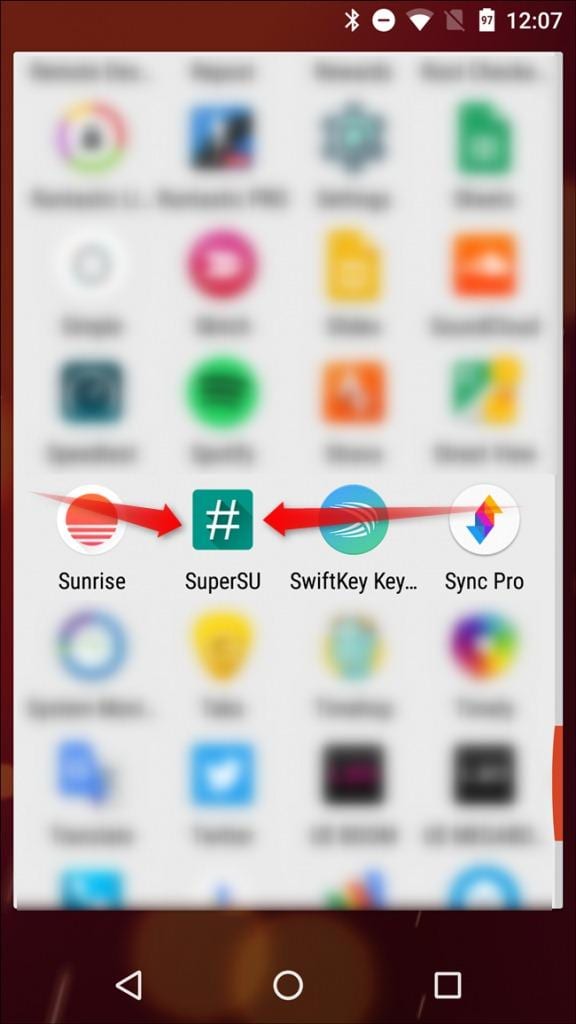
Step 1. First of all, Download and install the App SuperSU from Google play store and Launch it.
SuperSU allows for advanced management of Superuser access rights for all the apps on your device that needs root. This app also includes the option of “Full Unroot” which we will be using.
Step 1. First of all, Download and install the App SuperSU from Google play store and Launch it.

Step 2. Now you need to go to setting tab in SuperSU app and scroll down and you can see “Cleanup” section now where you need to tap on “Full Unroot” option.

Step 3. On the very next step, you can see a Confirmation dialog box. You need to click on “Continue”

That’s it! you have successfully unrooted your device, and after that, you just need to restart your device in order to finish the process.
2 Using KingoRoot
The remove-root function is built in KingoRoot Android (PC version), which is a considerable decision made my Kingo R&D team while programming the software. It offers users a choice to revert back to unroot status by one click, fast and simple.
Step 1. First of all, Download and install the KingoRoot Android (PC version) and launch it on your computer. Now connect your device via USB cable. (USB Debugging mode must be enabled on your Android device)

Step 2. Now KingoRoot will detect your Android device, and you will see two options “Remove Root” and “Root Again”

Step 3. Now you need to select the option “Remove Root”, now you have to wait for few minutes until KingoRoot Unroot your device.

Unroot Any Android Device In Single Click
That’s it! You are done, Kingoroot had successfully unrooted your android device.
3 Using ES File Explorer
Well, ES File Explorer is one of the best file managers to have on your Android smartphone. You can also use this awesome file manager app to unroot your rooted Android smartphone. Below we are going to give you some simple steps which you can follow to unroot your Android device easily using Es File Explorer
Step 1. First of all, you need to download and install ES File Explorer app from Google Play Store on your rooted device.
Step 2. Now launch the app and then tap on the menu button
Step 3. Under the Menu button, you need to scroll down to ‘Tools’ and then turn on ‘Root Explorer’
Step 4. This will ask you to grant the root privileges. Simply grant the permission and then on the main screen of the app you need to find your device’s root folder. You can find this as ‘/’ in explorer.
Step 5. From the root folder, you need to find and locate to ‘System’ | ‘Bin’
Step 6. Now there you need to find the ‘busybox’ and ‘su’ files and delete them.
Step 7. Now you need to navigate back to ‘/’ and open the ‘app’ folder. From there, delete superuser.apk
That’s it, you are done! Now you just need to restart your Android device and your device should reboot unrooted.
So these are the two apps to Unroot your Android device in 2018. With the help of these two apps, you can unroot your Android without any difficulty. Do try any of the apps and let us know which one worked on your device. Share this post with your friends too! and leave a comment below you are facing any problem concerning the above methods

